In our last post, we explored how to use CapCut templates on PC to make trendy, fast edits in just a few clicks. You learned how templates save time while keeping your content professional.
Now, with auto captions, we’re making your videos not just stylish — but accessible and attention-grabbing too.
Ever watched a video with captions that just clicked with every word?
That’s not luck — that’s smart editing.
Captions make your videos easier to follow, boost engagement, and keep viewers watching longer. But let’s be honest — typing them manually is a nightmare.
WAIT, THERE’S MORE! You don’t need to do that anymore.
With CapCut’s Auto Captions feature, you can generate perfect subtitles in just a few clicks. No transcription tools. No extra software.
Let’s dive into how to add auto captions in CapCut PC step by step, so you can spend more time creating and less time typing.
Follow these steps exactly and you will be ready to edit.
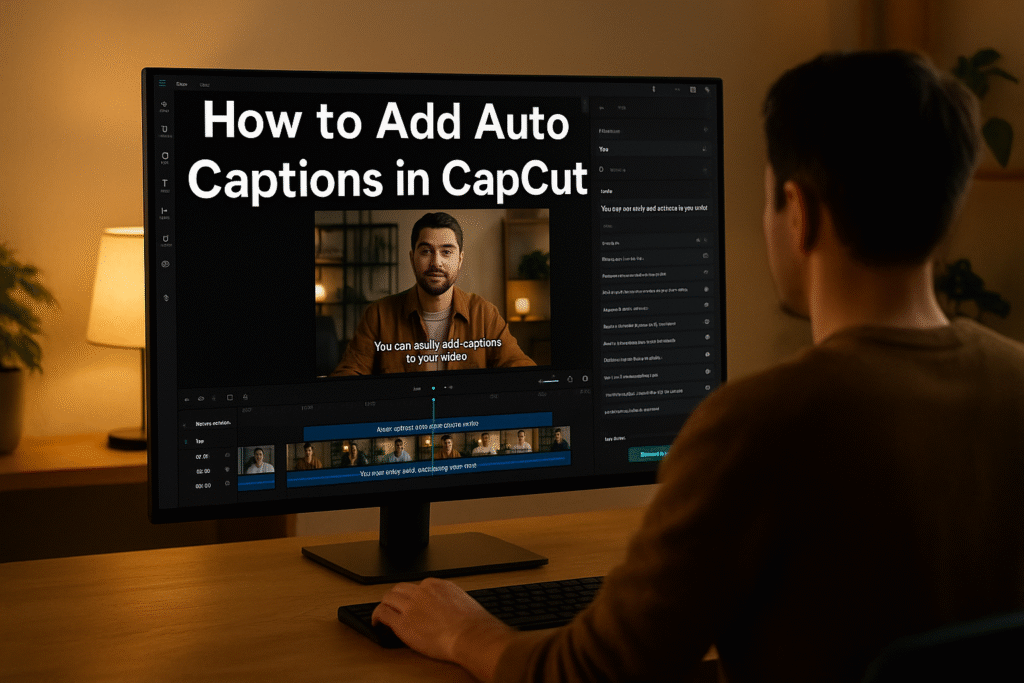
Start by opening CapCut Desktop on your computer.
Click New Project and import your video file by dragging it into the timeline.
You can also upload clips from your cloud or mobile sync if you’re using CapCut across devices.
Pro Tip: Keep your audio clear and crisp — this helps CapCut generate more accurate captions.
Once your video is in the timeline, head over to the Text tab at the top menu.
This is where all text-related features live — from basic titles to subtitles and the magical Auto Captions button we’re about to use.
Step 3: Select “Auto Captions”
Now, click on Auto Captions.
A small window will pop up asking you to choose your language.
Select the language of your video’s dialogue — for most users, it’s English.
Then click Start.
CapCut will automatically scan your audio and, within seconds, create accurate captions that appear perfectly timed on your timeline.
Crazy, right? No manual typing. No guesswork. Just instant, clean subtitles.
Here’s where the magic happens.
Once the template loads in CapCut Desktop, you’ll see placeholders marked for:
-
Videos
-
Images
-
Logos
-
Text
Click on each slot and import your media — drag and drop from your computer or use files from your CapCut Cloud Library.
CapCut automatically adjusts your clips to fit the template timing and transitions.
No need to tweak endlessly — it’s like magic
Once everything looks good, it’s time to style it up!
You can:
-
Change the font and size
-
Adjust color and alignment
-
Add shadow or background boxes for better readability
-
Position your captions anywhere on the screen
Make sure your text color contrasts with your video background for maximum clarity.
Pro Tip: Use brand colors in your captions for a professional, consistent look.
Adding auto captions doesn’t just save you time — it helps your content reach more people.
Here’s why:
-
85% of social media videos are watched without sound
-
Captions improve accessibility for hearing-impaired viewers
-
They boost watch time, engagement, and SEO on platforms like YouTube and TikTok
In short: captions aren’t optional anymore — they’re essential.
With how to add auto captions in CapCut PC, you can now produce high-quality, professional videos with minimal effort. The auto caption feature saves you time, improves accessibility, and gives your content a polished, studio-like finish — all within seconds.
In this blog, we discovered how to use CapCut templates on PC to create stunning videos in minutes. From browsing trending template categories to replacing media with your own clips and customizing the final look, you now know how to turn any idea into a polished video fast. Whether you’re making reels, promos, or vlogs, CapCut’s ready-made templates are your shortcut to viral, professional-looking edits without the editing headache.
Here are some ideas:
TikTok videos
School projects
Product promo videos
Gaming clips
Vlogs
CapCut is especially good for AI video ads for ecommerce marketing, meaning you can:
Create product showcase videos
Add auto captions to increase sales
Use AI templates for fast results
Perfect for beginners who want to create professional ads.
While the mobile app is great, the desktop version gives you:
-
A bigger screen to edit better
-
More control over effects and text
-
Faster editing and exporting
-
Keyboard shortcuts to save time
-
Better AI features for ads & business
If you want to grow on social media or make marketing videos, desktop editing will make your life easier.
Because video is the future!
By 2030, over 90% of online content will be video.
People who can edit videos will have:
✅ More job opportunities
✅ More business growth
✅ Better marketing results
✅ Bigger social media audience
Learning CapCut now makes you ahead of many others
Adding captions used to be tedious — but now, it’s effortless.
With CapCut’s Auto Captions tool, you can transform any video into a professional, accessible piece of content in just a few clicks.
No more typing, syncing, or struggling with third-party apps.
Just import your video, click Auto Captions, and you’re done.
Try it today — and see how captions can make your videos more powerful, engaging, and inclusive.
Stay tuned for Day 10, where we’ll smooth things out with transitions.
Find quick answers to the most common questions about How to Add Auto Captions in CapCut PC, and discover how this simple editing step can instantly make your content more engaging, professional, and ready to grab attention in 2026.
Yes! After generating captions, you can edit the text, fix errors, and adjust timing directly on the timeline.
CapCut’s AI engine is highly accurate, especially for clear audio. However, minor edits may be needed for background noise or accents.
Absolutely. You can customize font, size, color, background, and even add text animations.
Does CapCut support multiple languages for captions?
Yes! CapCut supports dozens of languages for auto captions, including English, Spanish, French, Chinese, and more.
Can I use auto captions offline?
No, generating captions requires an internet connection and a PRO subscription as well because the feature relies on CapCut’s AI servers to process the audio.